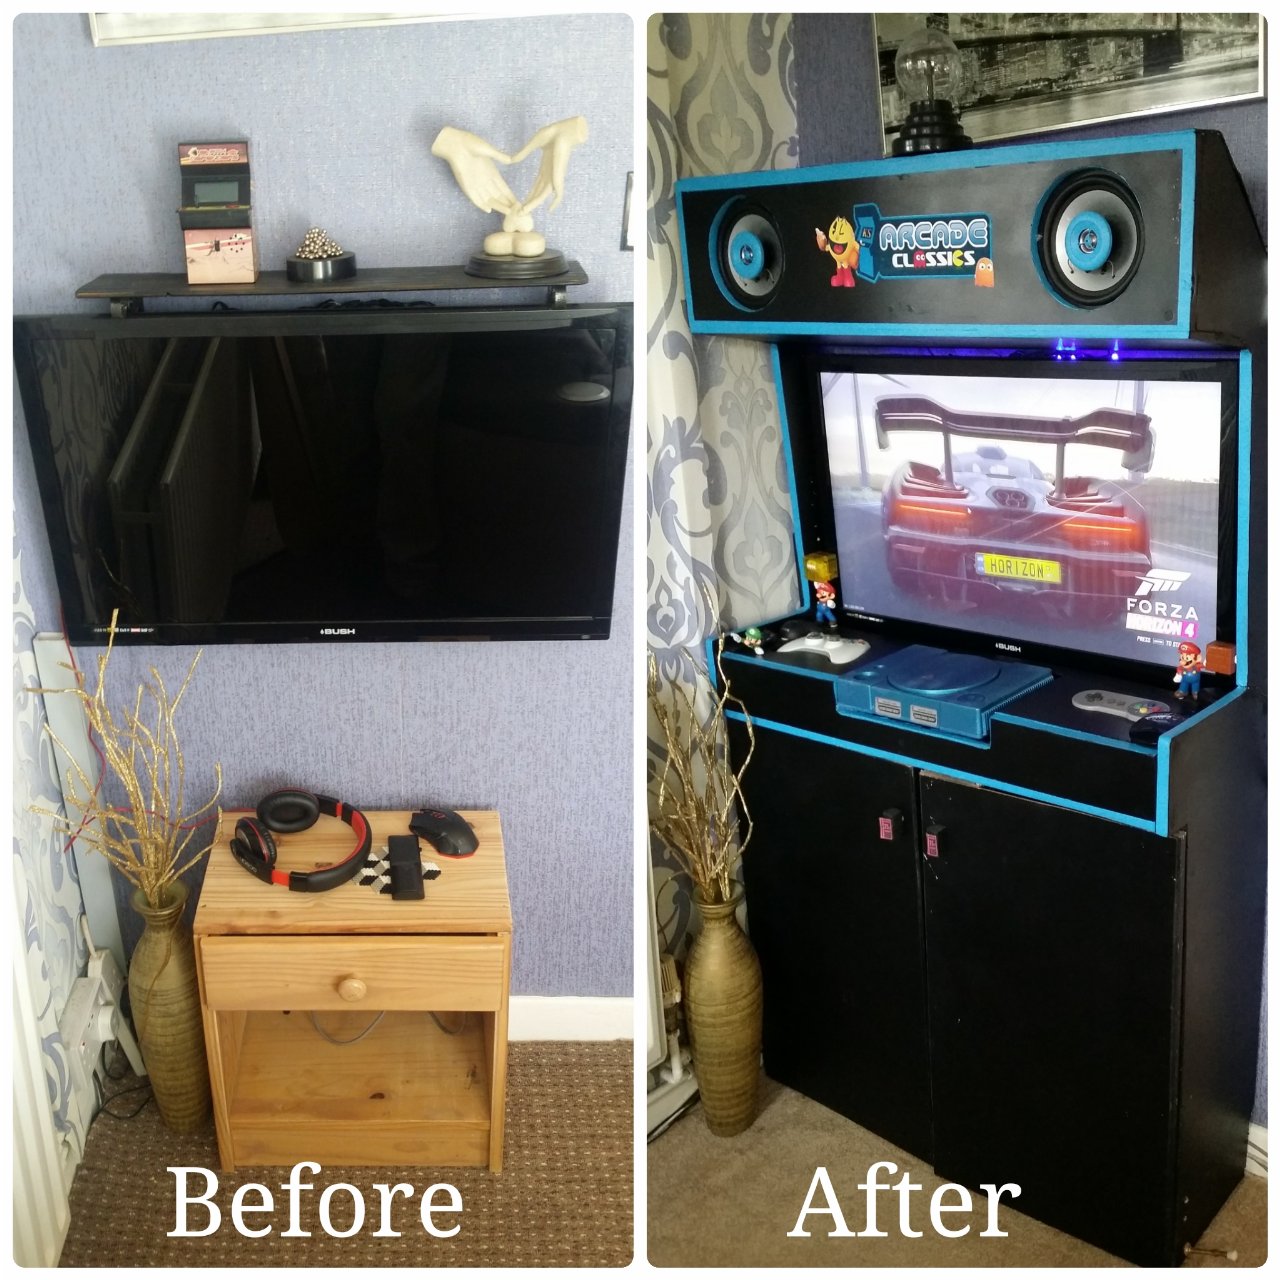
In the corner of our living room I have a separate 32″ TV just for gaming, I use an android TV with moonlight gamestream that uses the Nvidia gamestream to stream my pc games from my main pc in the office upstairs to my android devices. The TV in the corner was mounted on the wall and just had a small cabinet to store the small android TV box and controllers etc. The chair I use is a living room large swivel chair with built in speakers. I wanted something to look at bit better. I had to buy a second hand IKEA wardrobe just for the doors as we have the ones with the clear section in the middle and had broke one, so was cheaper to get a second hand wardrobe that cost me just £15, I used the one door then have a spare. The main wardrobe I didn’t need so thought would be a good idea to use this to build an arcade cabinet.
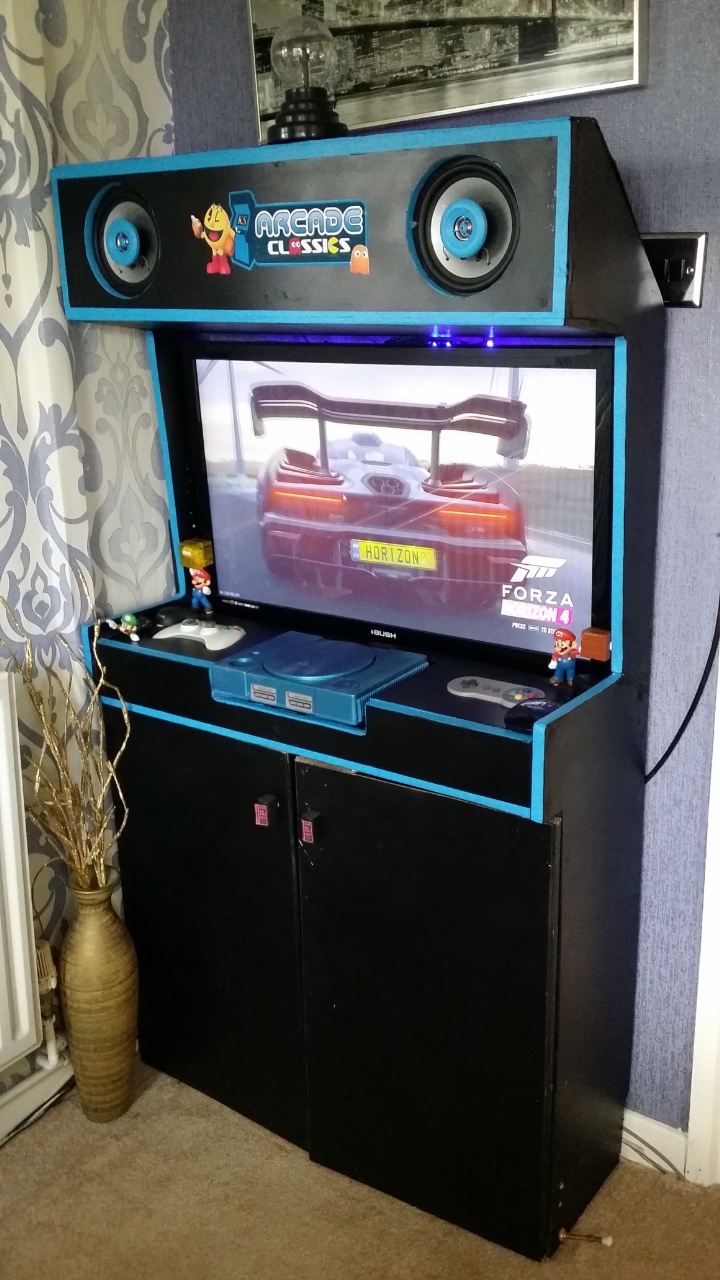
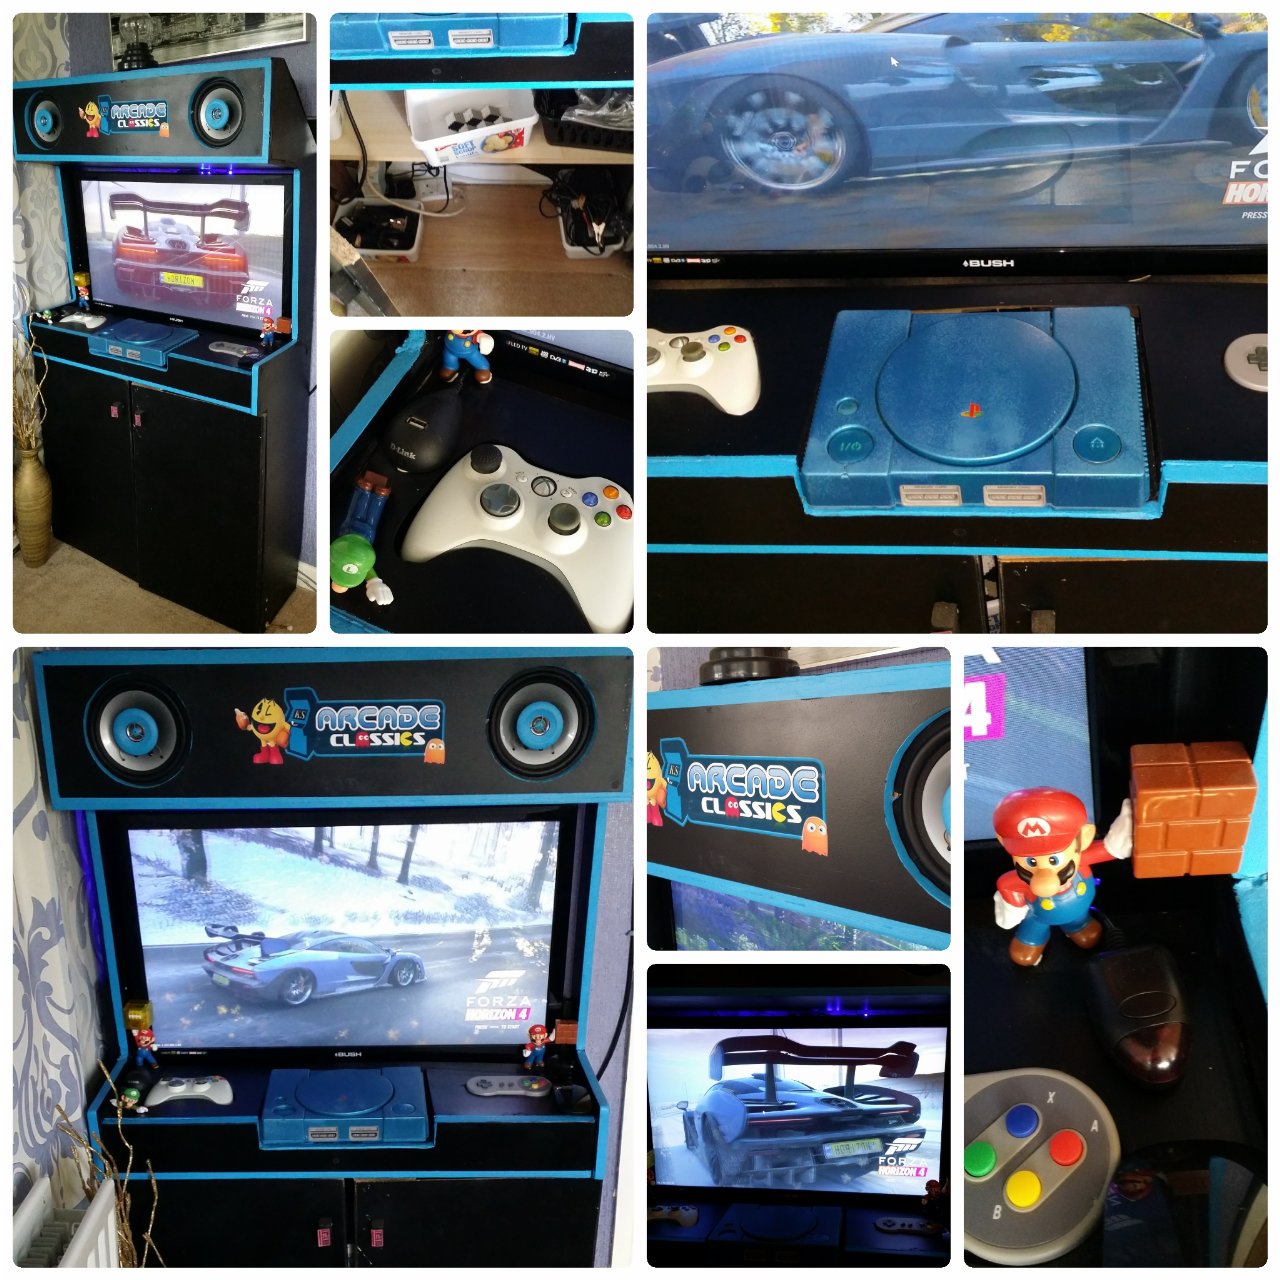
I had a few requirements for the cabinet, the main one was to be free standing built around the TV on the wall. A cupboard underneath for storage, speakers in top, the main shelf to hold a PlayStation one (android TV inside) and spaces for xbox 360 and USB SNES controller for retro gaming.
I first started working out the measurements, the two sides of the wardrobe I drew out the shape I came up with then cut out to the shape just using a jigsaw. I cut the first side out then drew round that for the other side. I worked out the width of the wardrobe was nearly perfect for the width and gave me just under 2cm leeway either side of the TV. The top front I cut down from the top of the wardrobe and cut out where the speakers would go, the speakers are some old car speakers I had, that will be wired into an old pair of pc speakers I had got of carboot for just £1. The slope of the back was cut out of the hardboard from the back of the wardrobe and bent so that was secured at the top and then could lift to get access to add the speakers.
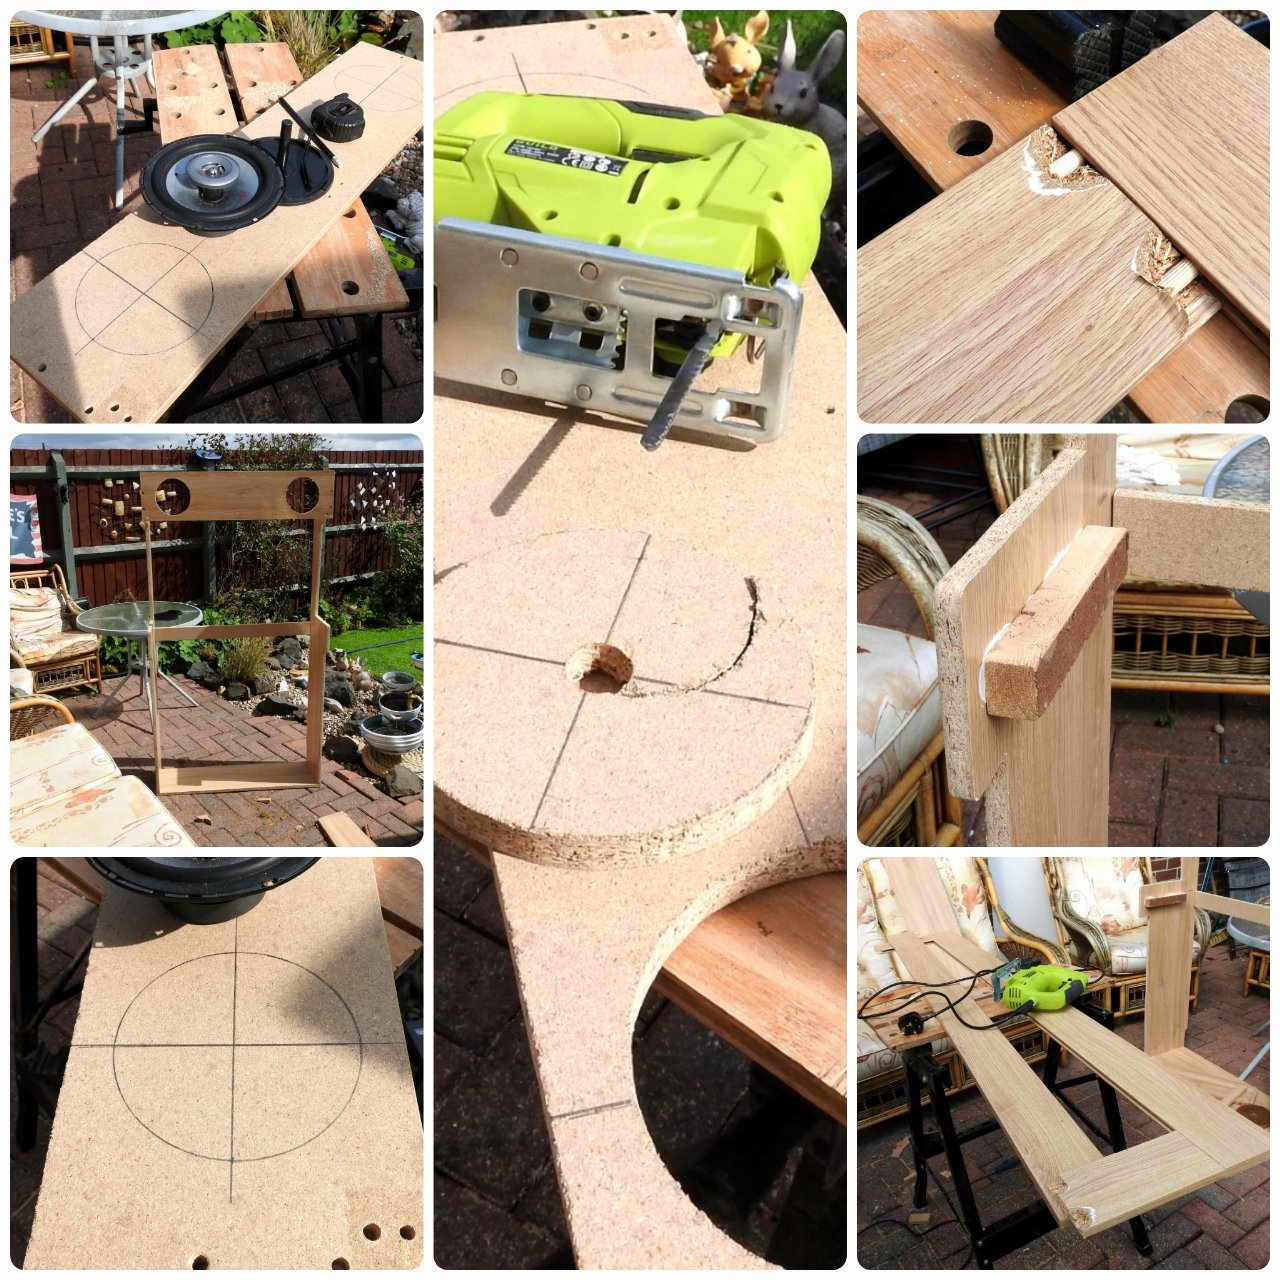
The shelf part was made in several section first the base and front, the top was the hardboard off the back of the wardrobe, as I wanted to cut out spaces for the controllers that will be recessed, so will be level with the top, and used spare bits of wood to build up for the supports. The middle section was completely cut out to the size of the original PS1.
The bottom was from the original bottom of the wardrobe, I then cut down the old door I had from our existing wardrobe, as the middle was the clear perspex, I put hard board on the front, I cut new hinges holes and used existing hinges to attach. For the handles on the doors just used small old bits of wood shaped and glued on. I also put a shelf inside to make it more useable for storage..
To attach all I mainly used screws from the side direct into the wood, also used some supports as well. Once all put together filled in the gaps with wood filler and sanded down ready for painting. Now this is where it when wrong slightly as had it out standing up in the back garden to spray paint, and unfortunately after spraying the first coat, the wind caught it and fell over, which unfortunately broke it half, just by the shelf part. I just used some spare wood to create brackets inside to join together, as you wouldn’t see the crack as one side is against the wall and the other is by the living room door that opens towards it.
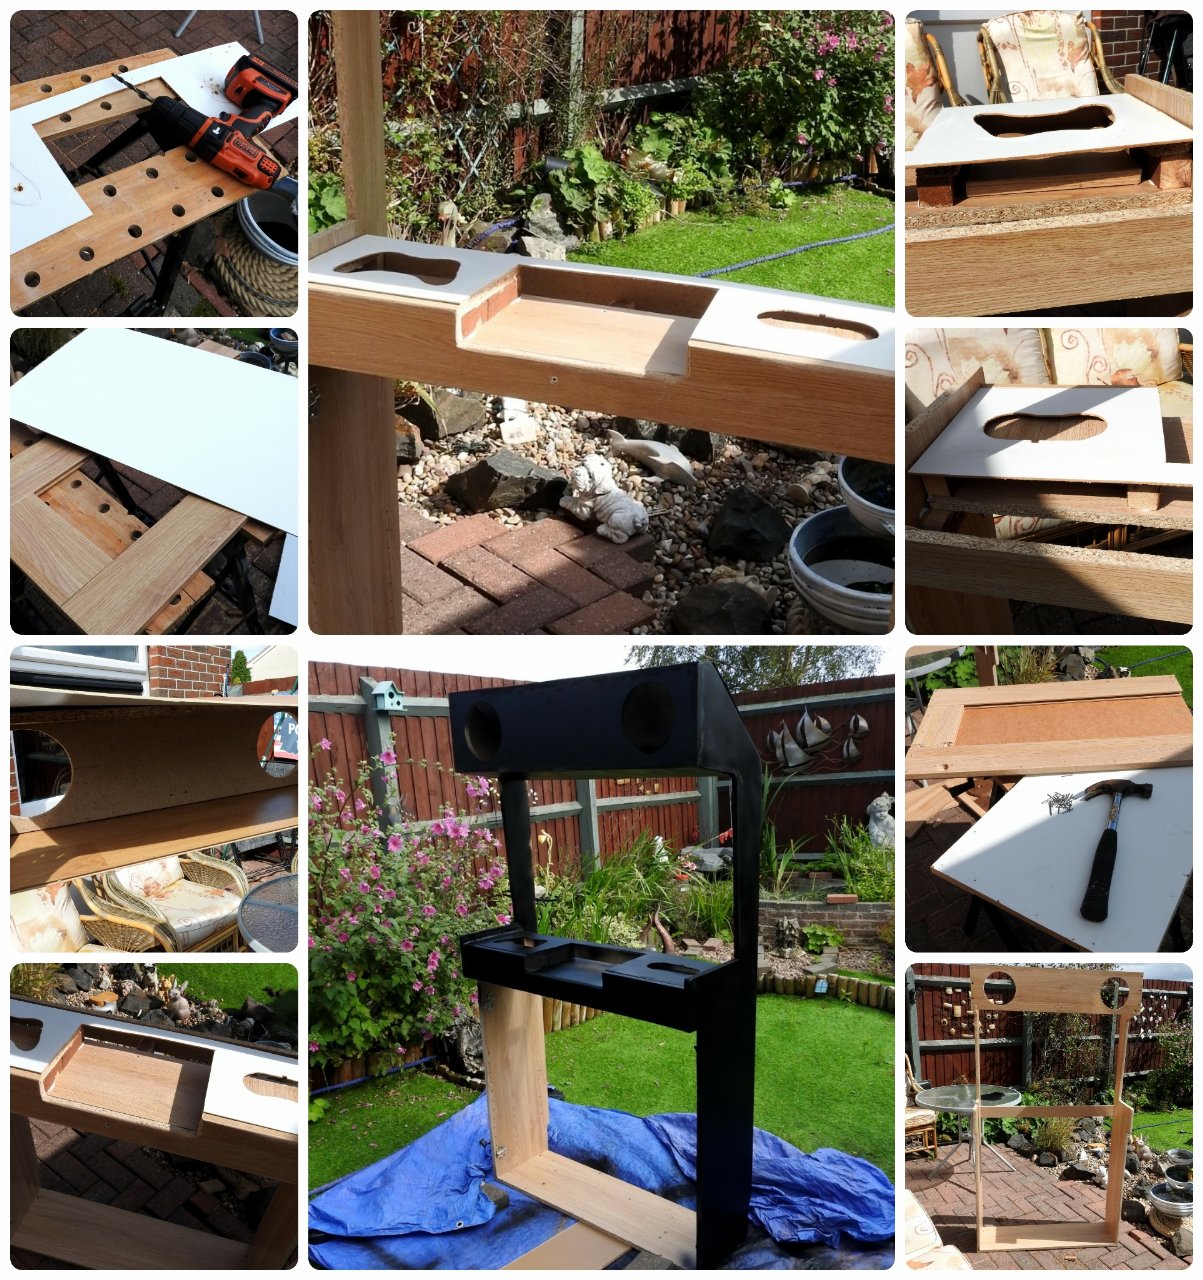
I used black spray paint for the whole unit and then got some acrylic blue paint to highlight the sides strips and even painted the front parts of the speakers. All the cables come trough the unit as there is no back on it, around the existing TV was some blue led lighting I left that there so when on you get a nice glow around the TV. I got an image off the net for the top part, and some coin slot images printed these out and stuck them on. I had got 2 Mario figures that look perfect on the shelf, to give more a retro feel.
Now the project didn’t fully go as planned, as the cupboard doors aren’t that great with the hinges I have got and still some slight gaps. And the front parts aren’t that level, as the wardrobe I got was a few years old and so the wood had bowed a bit. But the original idea was to see if could use an old wardrobe to do this ie upcycle the furniture and try not to use any other materials. Also got to fit the android tv into the PlayStation properly and fully spray paint it. I will be making a new one in the future with new materials, but at the moment looks ok in the corner and unless you look closely you don’t notice the mistakes. And just from basically scrap and just a few hours of my time.
So as you can see from the photos below our corner of the room as gone from just a tv on a wall with a little drawer unit to something a lot better. so adds a bit more character to the room and doesn’t take up that much space at all.