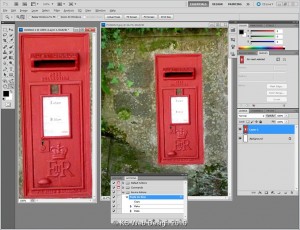
As I use alot of graphics editing software for doing all the graphics for the websites I do, I have been mainly using Ulead Photoimpact or Paintshop Pro both by Corel for the last few tears, I have mainly been using these software as for what I need to do with the images I create I an do it wuicker in wither of these than photoshop. Though now I am finding I need to use Photoshop as my main software again after a good few years away from photoshop.
The main thing that I miss that isn’t within Photoshop direct is copy and paste as new image, as this is a part of the way I design graphics and then splice up I do alot. The default way within photoshop is selecting your selection, then clicking the Edit menu then copy, then clicking the File menu then new, then in dialog box click ok, the finally edit then paste. This is more long winded than other software ie Photoimpact, you just drag selection to blank part of screen and it creates a new image of that selection. So i tried to find an easy way to do this on the net, but couldn’t find anything to do this direct.
So I have worked out a way to create a shortcut within photoshop to do this, This can be done using the actions facility within photoshop. The actions facility allows you to record multiple steps and apply just using one action. this only takes a few steps so very simple to setup. the following instruction are using photoshop CS5 within windows, but this should work with other versions.
First you want to display the actions toolbox in photoshop, click Window menu then Actions (Alt+F9) This will then display the actions toolbox, if you have never done a action you are best to create your own set, this is where any actions you define will be. At the bottom of the actions toolbox there are a few icons click the “create new set” icon, you will be then asked for a set name type a name for your set. make sure you click on your set.
Then open any image doesn’t matter what, once you have image on screen just make a selection any size etc, then within the actions toolbox click the “create new action” icon, Type in the name of your action, you can also specify a f_key short-cut to your action, then click “ok”n this will then start recording your steps, so click edit – Copy, File – New Image (leave set to default) then click ok, then click edit – paste. You now need to stop the recording of the action, so click the “stop” icon. You can now use your defined shortcut key or click within the action toolbox your action to copy and paste a selection to a new image.
See the basic video below for details, sorry no sound
This is just one use for the actions facility, so you can setup actions for common different affects you use for images, so you only have to click the action once, these do save time, sorry if I haven’t explained this fully as this is the first time of writing a tutorial, but I hope this helps some people out.

