
If you’re dreaming of turning your work van into a cozy camper, you’re in the right spot. In this article and accompanying video , we’re diving into the gritty start of my Vauxhall Vivaro crew cab conversion. This van – same as a Renault Traffic – has a plastic bulkhead and rear seats that eat up space. I needed that room for a bed, storage etc. But with my spinal issues, every step takes time. Stick around as I walk you through removing the bulkhead and seats. It’s messy, but doable for beginners.
First off, why bother? The crew cab seats are great for hauling kids or grandkids, but for camper life, they gotta go eventually. I kept mine in at first for practical reasons – daughter and grandson needed seats till I sorted out a bed frame with seatbelts that I could install. Removing it opens up the van for insulation, windows, and a proper layout.
This is a breakdown of the steps I did to take them out. This is for my series on my YouTube channel, you can watch the video below of me struggling to get the bulkhead out.
For writing this article I have laid out the steps in turn that I would recommend, but if you have trouble following along watch the video then you will see as if you watch the video the problems I had getting the bulkhead seats out blind. For me I did slihty different order tahn these steps because just wanted the bulk head out first whilst still leaving the seats in, So if you are taking out everything bulkhead and seats follow this order.
Tools You’ll Need:
- 19mm socket wrench
- Drill for rivets
- Screwdriver set
- Hex keys
- Pliers for clips
- Maybe a friend for heavy lifting without help.
Removing Rear Seats
Step 1: Tackle the Braces Start with the metal braces holding the seat frame. There’s one up top and one below on each side. Grab your 19mm socket and loosen them. My van had a aftermarket plastic panel that was hiding one of the bolts, so if you can’t see all six bolts check under any panelling.
Step 2: Remove Rear Seats Taking out the seats even though I was keeping the Seats for a while made removing the bulkhead easier. First best to remove seat paddings as this makes it a lot lighter and easier to get out.
Step 3: Seat Padding: The seat pads remove different depending on which one, so here’s the basics, though easy when you look at them. Middle and passenger side : Undo hex bolts on the hinged seats, mine had strap around the hinges so removed those, This then allows for the storage tray to be removed from the back. This is in two parts there maybe rivets that need drilling out on the top part . Driver side: this one just clips there is a metal bar underneath so it can be tricky to get out.
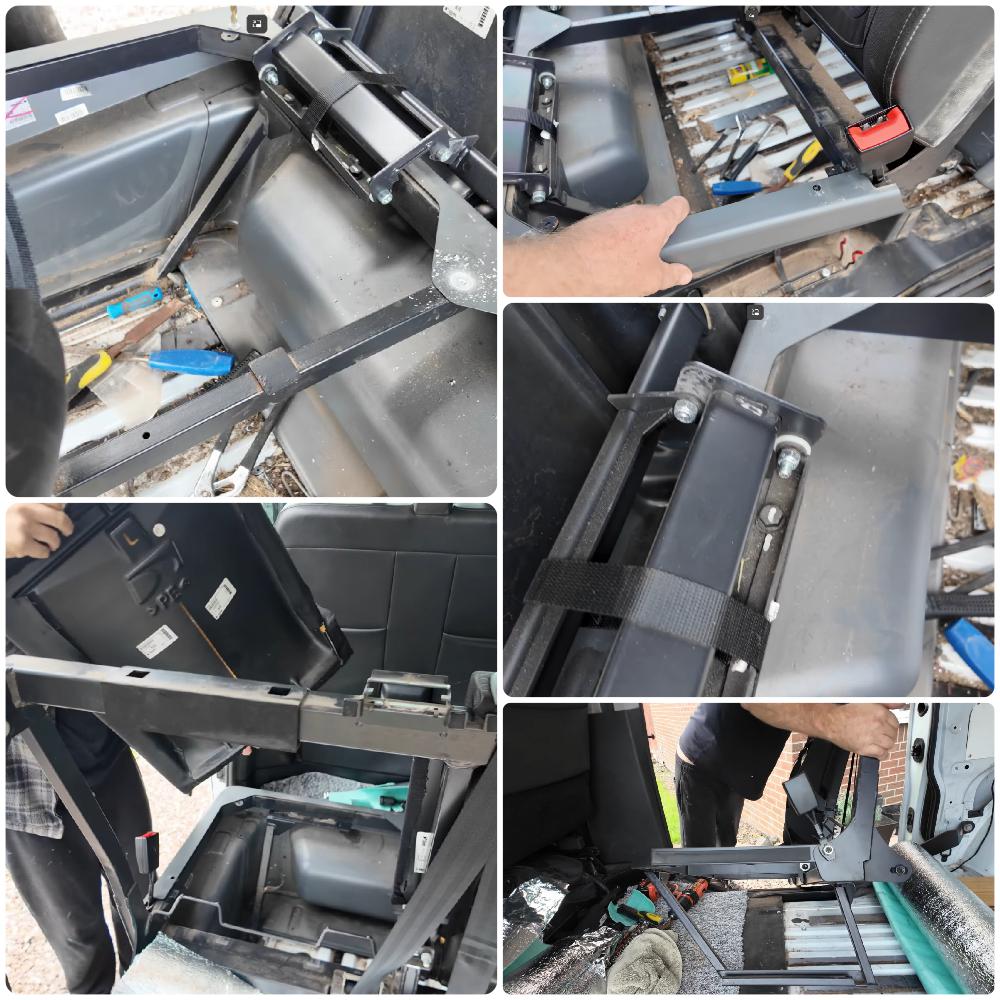
For the padded backs, first remove the headrest and the supports are plungers – press, and they pop out this enables you to easily unclip out the passenger and drivers side. You may need to unclip the seat belt holder, The center one’s trickier around belt bolts, which need to be removed so undo the bolts holding the bracket.
Step 4: Plastic frame: There are rivets on the bottom trim under cushions, which I drilled out so could remove the whole plastic part for weight reasons.
Step 5: Remove Seat Frame Even if you just want the bulk head out but still keep the seats in you will temporarily need to remove the frame, as I found the bulkhead would fit through the rear boot doors it needs to be removed through the back doors.
Removing bulkhead
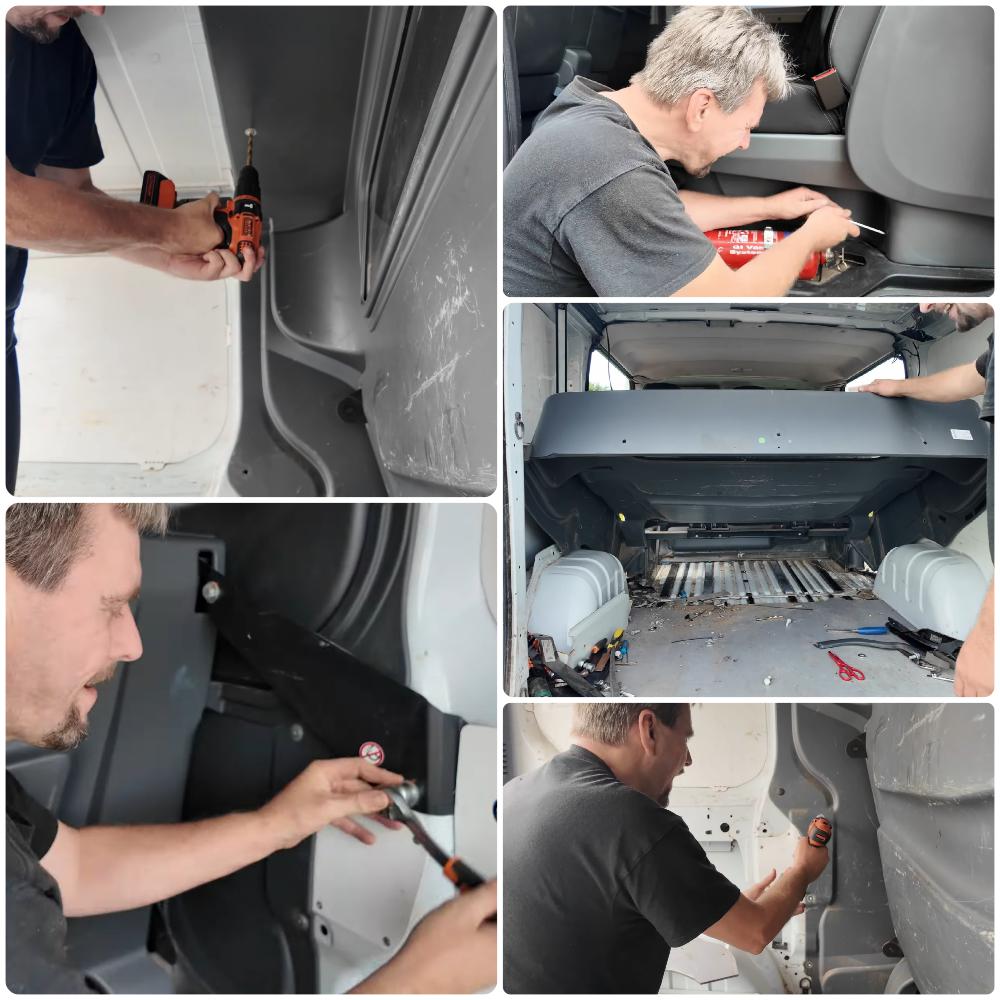
Step 1: Drill Out the Rivets The bulkhead’s riveted in. Drill them carefully – some have plastic covers. They are located at the top and some on the sides do drill steady as you could damage the bulkhead. Mine had a mix of rivets and screws. Once loose, it should pop out though like mine wouldn’t budge was stuck on the wooden floor that had been installed in the back. So I had to pry, cut, hammer etc to get the flooring out first.
Step 2: Remove Bulkhead Pro tip: If you’ve got aftermarket flooring like me, remove it first. Mine was screwed down and wedged under the bulkhead. So trust me this will save you a lot of problems.
Step 3:Remove From Van: The Bulkhead now should be loose, it is a bit bulky it is not that heavy but I would recommend having someone help you as it does flex a bit. Like I said above it is best to go through the back doors. You do have to twist and turn it a bit to get out of the van
Once out if you want the back seats back in, it is just the reverse of taking out the frame and seats pads as detailed above.
Challenges I Faced:
- Weight: Bulkhead + trim = Beast to get out. So Push sideways, forwards etc to leaver it out,
- Wiring: Check power, trace everything to make sure not damaging anything
- My Health: Arthritis, my lower spine problems mean I had to take breaks.
- Mess: Rivet bits everywhere – sweep up.
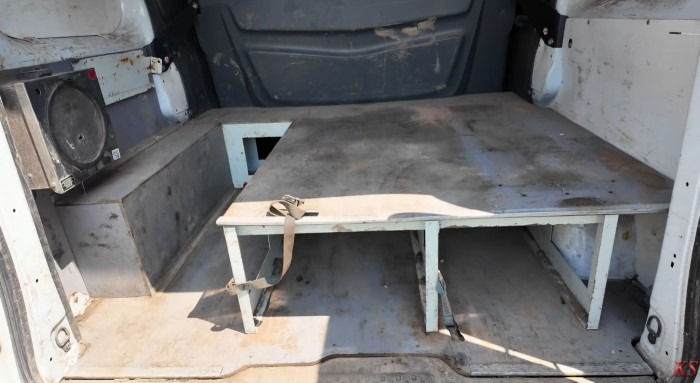
Aftermath and Next Steps: Bulkhead out, space freed! Seats back in temporarily I swept, then onto putting new floor down including insulation, adding rock and roll bed, that’s in the next article and YouTube.
This van’s going be my family hauler, work van (fish pond cleaning), and camper. My past Peugeot Partner conversion that I did myself lasted 4 years and I had no experience doing that conversion. So hopefully will have learnt from that

Tips for Your Build:
- Two hands beat one.
- Label wires.
- No floor = easier to work.
Now onto the next part of the conversion, which will be the new flooring and insulation, so stay tuned for that update.


This article answered a lot of my questions. Really appreciate the effort!