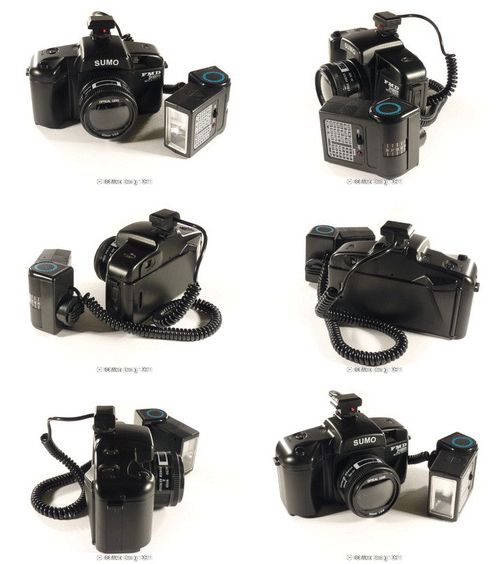
I Decided a few weeks ago to have a go at taking some 360 degree product photos for both animation and that can be interactive to turn the picture of any product or item around, like the animation above. There are companies that can supply the equipment and software but this can be expensive, so i decided to have a go using just diy stuff.
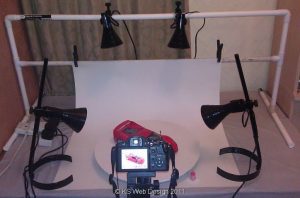
The first thing I did was to build a diy rig to test this out, you can see the test rig in the photo below. As this was just a test I used common materials to do this. I first built a frame to attach a backdrop and maybe lighting from above. I do have a fabric light tent but this wasn’t big enough for the items I wanted to photograph. This frame was made easily from plastic pipe I chose 22mm waste pipe and fitting at this was cheap enough from local diy store and would be the perfect size for attaching some clip / screw on lights. The lights that I used were from a well known furniture store I brought 2 clip on lights and 2 stand alone lamps on stand, these would take standard ses fitting bulbs.

The main part of the rig is a turntable for you to put your item on and that can rotate so you can take the shots needed to create the end result. I had tried making a turntable using two bits of chipboard and using a router to make one into a circle with a hole in the middle to attach a bolt that would allow the wooden circle to rotate. This worked ok but wasn’t smooth enough, I had seen on the ikea website a lazy susan, this was perfect for what I needed and only just over a fiver. So I got one of these as the bearing within this unit makes it very smooth to turn. I then spray painted this white and measured the circumference and divided that by 21 and then made marks at each of these 21 marks, I used 21 points, but can be anything from 20 – 30marks depends on how smooth you want the movement.
You then put your object on the turntable and set your camera up on a tripod, a good tip is to set your camera to manual mode, so that you can set your desired aperture and shutter speed depending on your lighting. The main thing to do is set manual focus so that the focus is always on the object you are taking. Also if you have a remote shutter release use this, if not use the self timer function on your camera to take the shots, this means that you don’t get any camera shake when taking the photograph, so you don’t end up with blurred images. Once you have taken the first shot, move the turntable to you next mark then take the next shot, keep doing this until you have taken all your shots.
Once you have taken the photos you can then edit and put together as a animation, this can be done as a animated gif, like the one at the top of this page, there are a few good pc programs just designed to do animated gif’s, I used photoshop to create the one at the top of the page. Using animated gifs means that all devices inc smartphones can display these, though you have no control over rotation. If you want control over the rotation this can be done various ways, I used adobe flash to create a template to control the rotation after the first automatic rotation. Though again there are several pieces of software that can do this with ease.
If editing your photos I would recommend you use a program that can batch process all the images so that any changes you make to the colour, brightness, contrast etc stays the same through all of your images.
The main problem you have doing this kind of animation / images is to get the lighting right, because I used normal bulbs and lamps, to get a good white you need to change your white balance setting on your camera, as normal bulbs arnt what are classed as daylight balanced bulbs, that is why bin the images you see on here the colours arnt perfect as I did want the background a perfect white, so in post processing I adjusted the levels of the images to get the near pure white, but this does can make the others colours more artificial. As you can see from the setup I had I had 2 lights pointing down to the background, this makes a lot of light at the back of your subject so in a sense washes out the background. I also then used to lights to illuminate the subject. This was the best setup I tried with the basic lighting I had available.
I will be investing in some proper studio lighting that bis fully daylight balanced and more powerful lamps, as this will save time in the processing of the individual images, and will produce better looking subjects with more true colours, some basic studio lighting that can do this is available of the likes of ebay for around £100, you could also use a light tent or something similar put the turntable and object in this will cut down on any shadows that you may get as the light tent diffuses the light.
All in all this was a interesting project to do and as you can see even using basic lamps and materials from any diy shop you can get reasonable results. The total cost I spent on this basic rig just to test was around £30 that included all the lamps, bulbs, piping and turntable, so a very reasonable cost for a little project. All the images / animations on this page other than the one at the top of the article you can rotate freely by moving your mouse left or right when over the animations. The ones within the article are some of my first attempts, the ones below are the final ones I did when I had got the lighting the best i could with the diy rig.
Interactive flash of a Dodge viper with opening doors, bonnet etc

Great info, thank you! I’ll try to make something cool right now 🙂